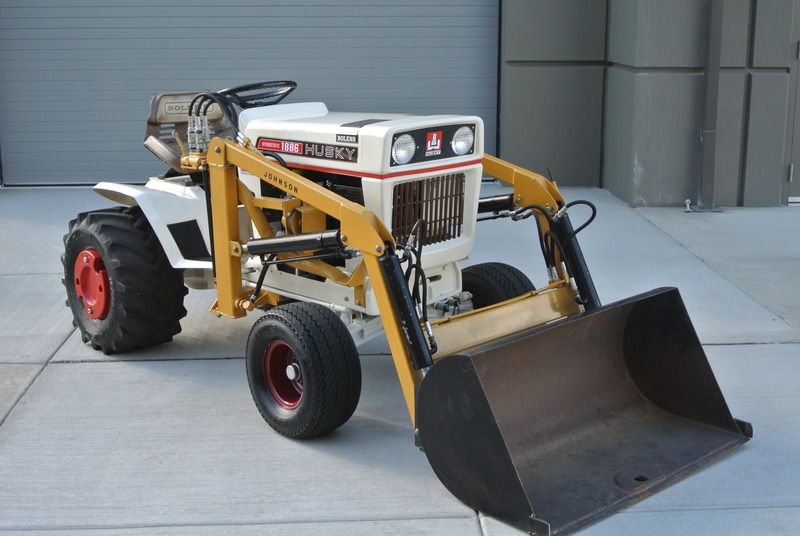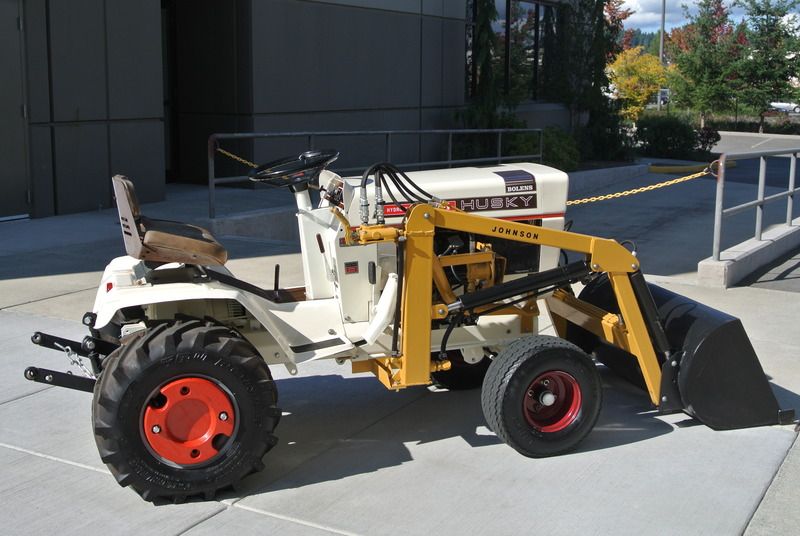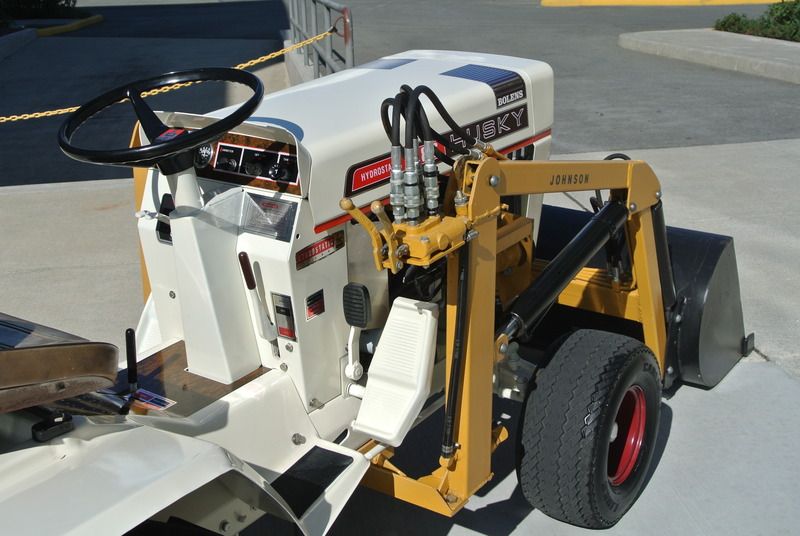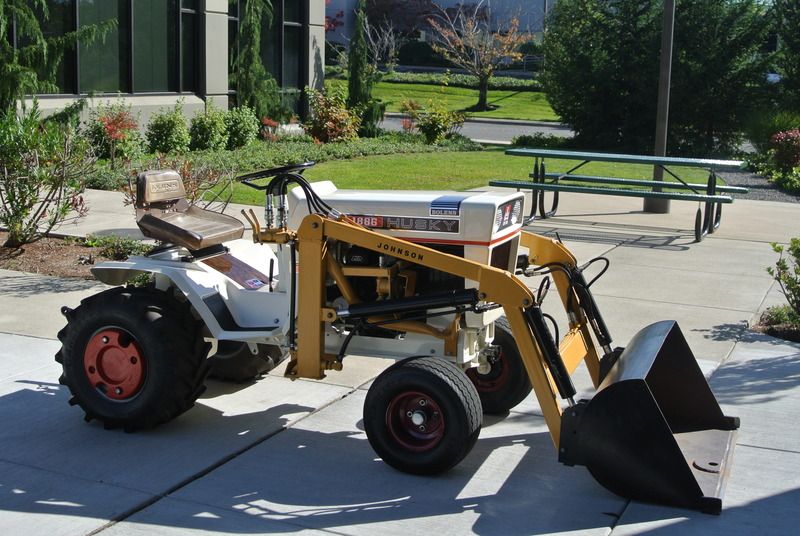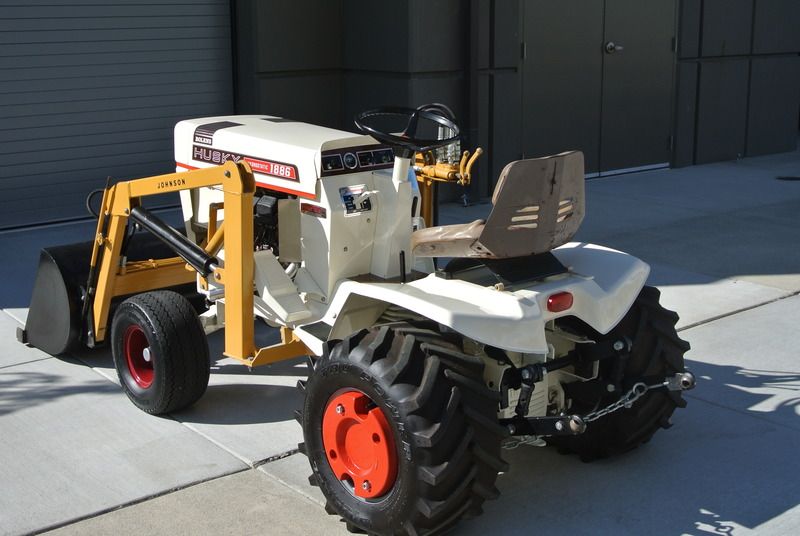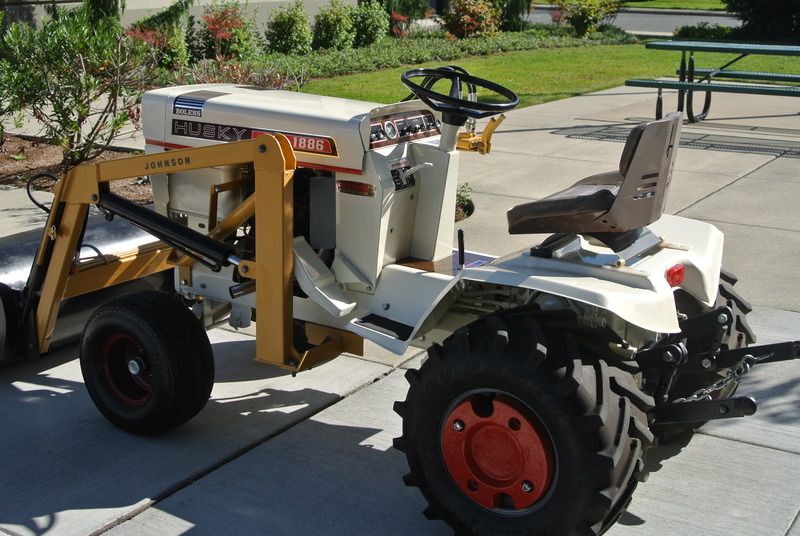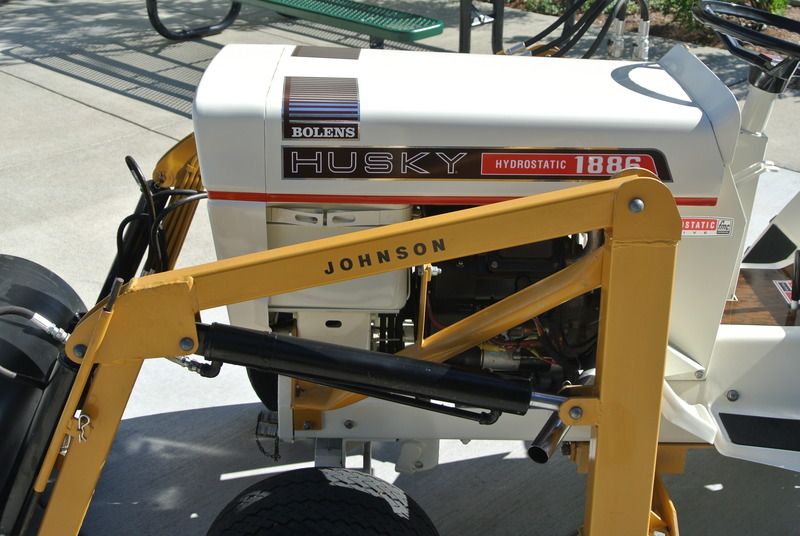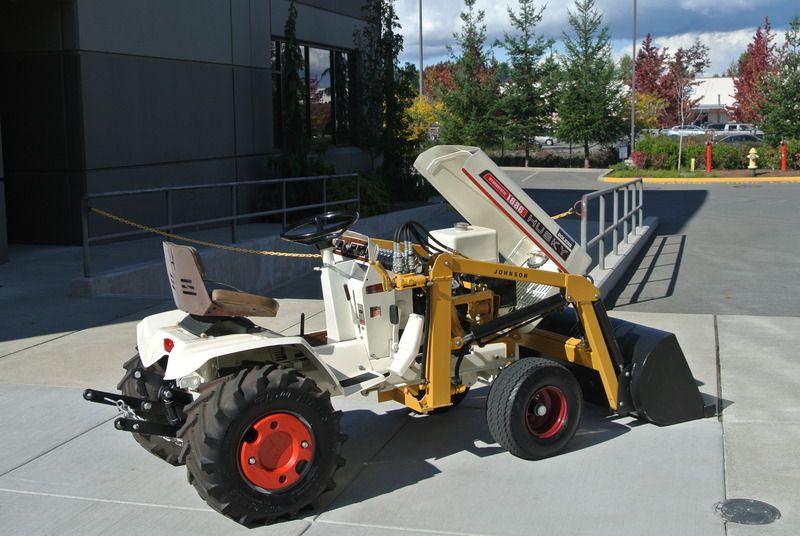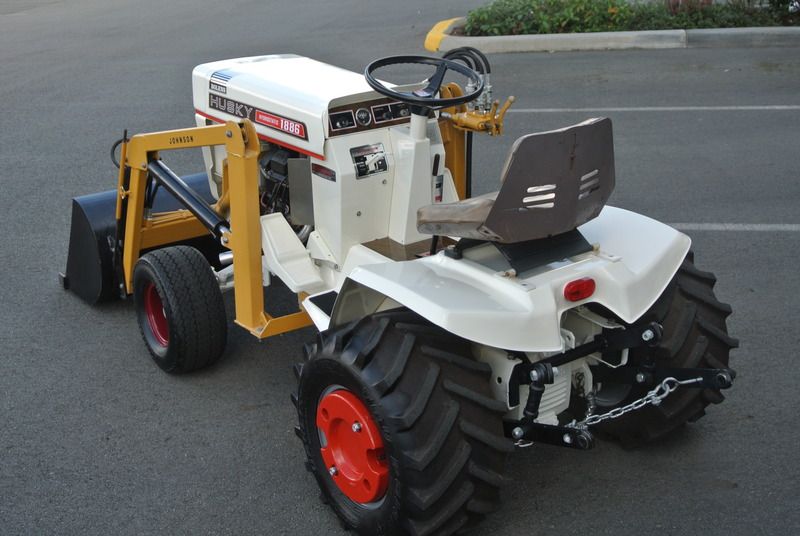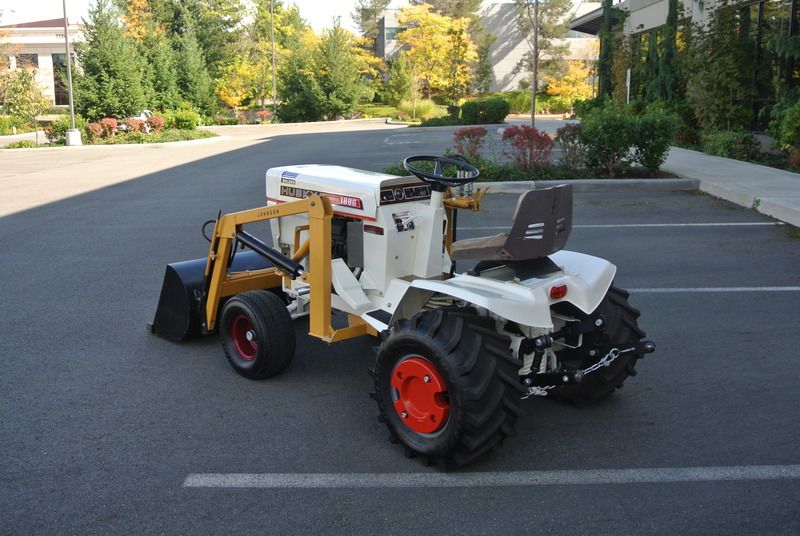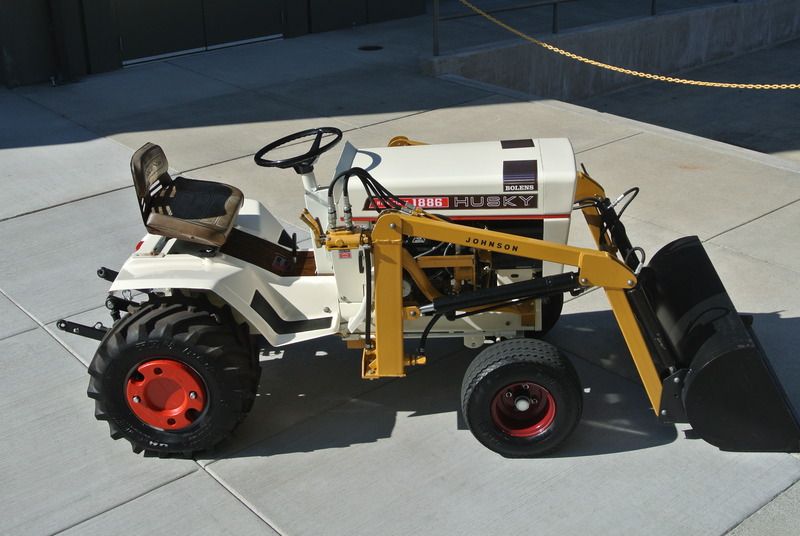
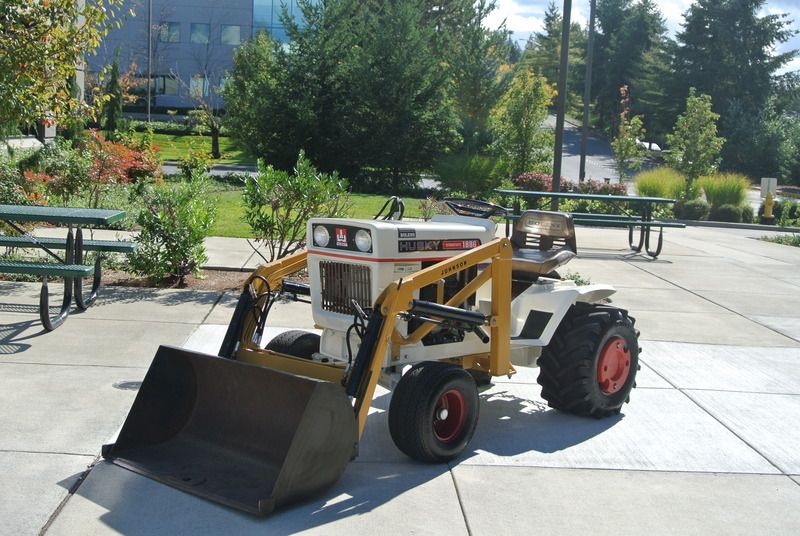
Here she is!
Here are some of the restoration specs. Steve Wike, the member I bought it from, went through it mechanically and did a modern engine swap in it among other things so I won't go into those details again but here are specifics of the restoration that it went under the past month.
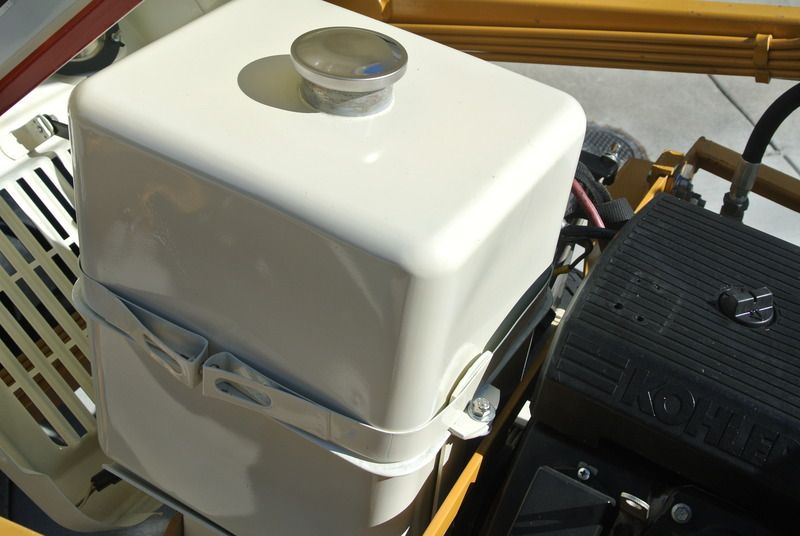
Paint:


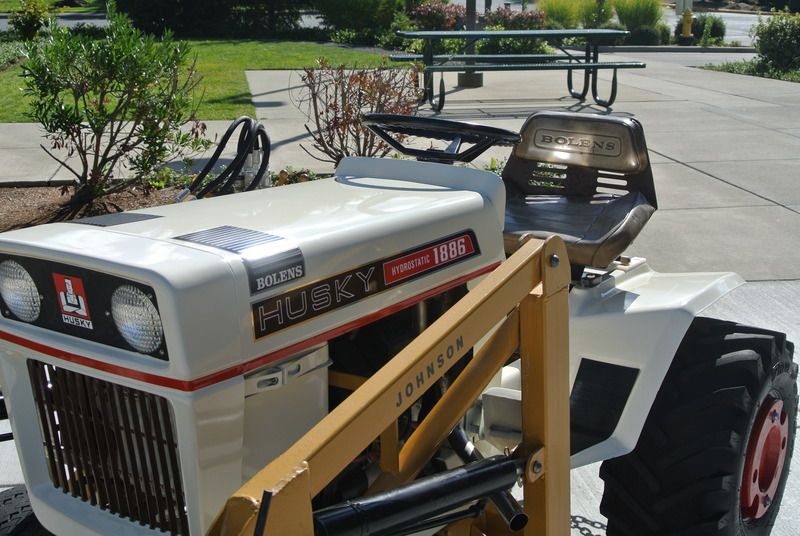
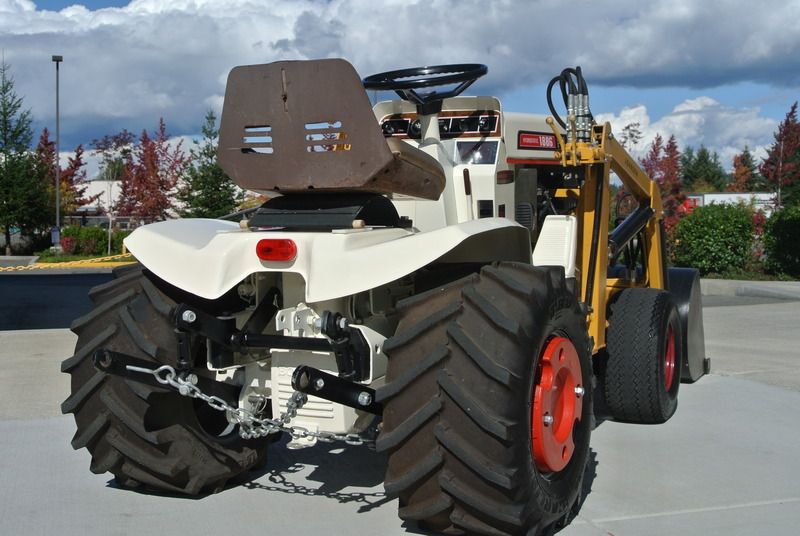
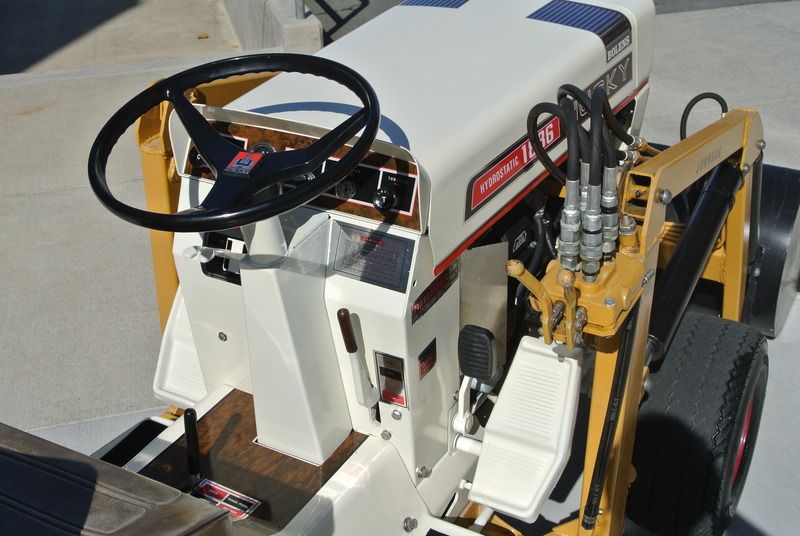
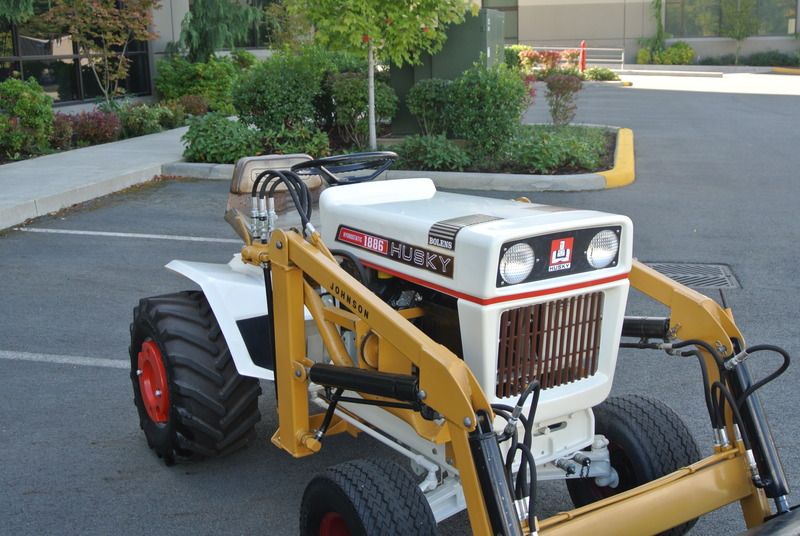
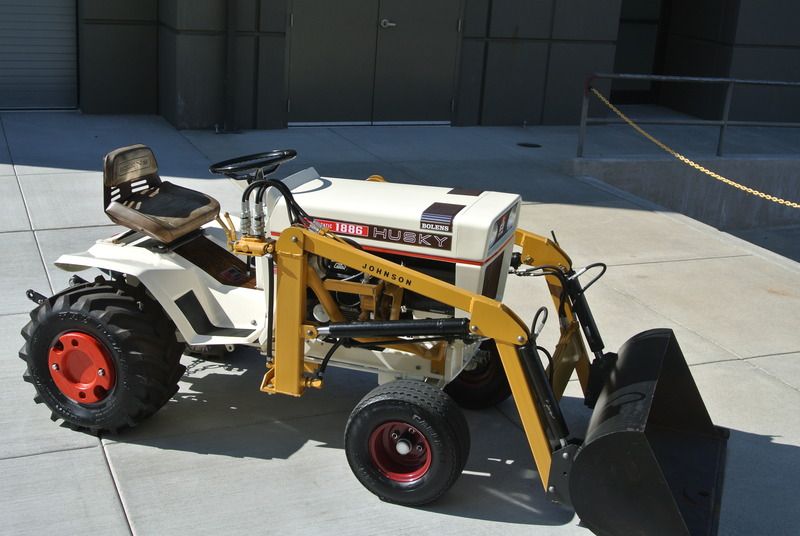
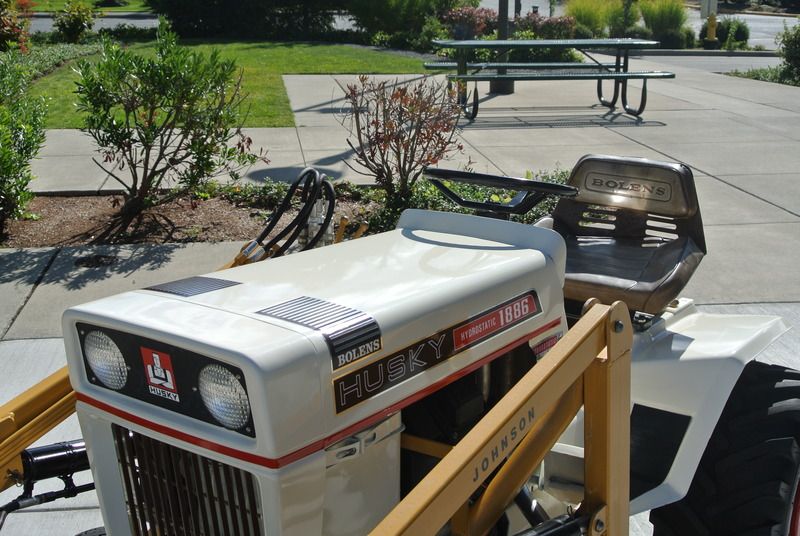
The paint is Valspar Automotive, same paint that is featured in Gas Monkey Garage. It is also fuel resistant It is "Wimbledon White" which is a real close match that we got from some original paint left on the PTO lever. The brown on the grill is called "Leather Saddle" brown.
I've always liked the look of exposed fasteners so I chose to keep them that way (at least the visible ones) and not paint over them. Steve replaced every fastener with stainless so they're not going to rust. Why cover them up?
Steering wheel:

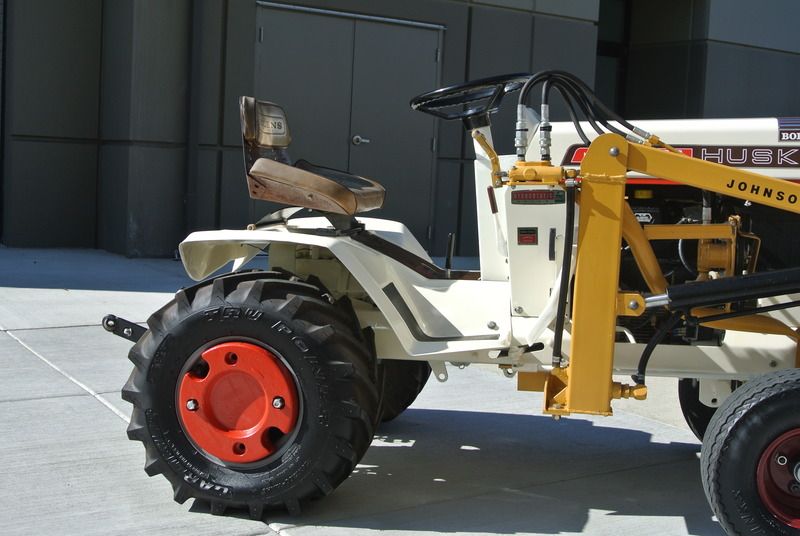
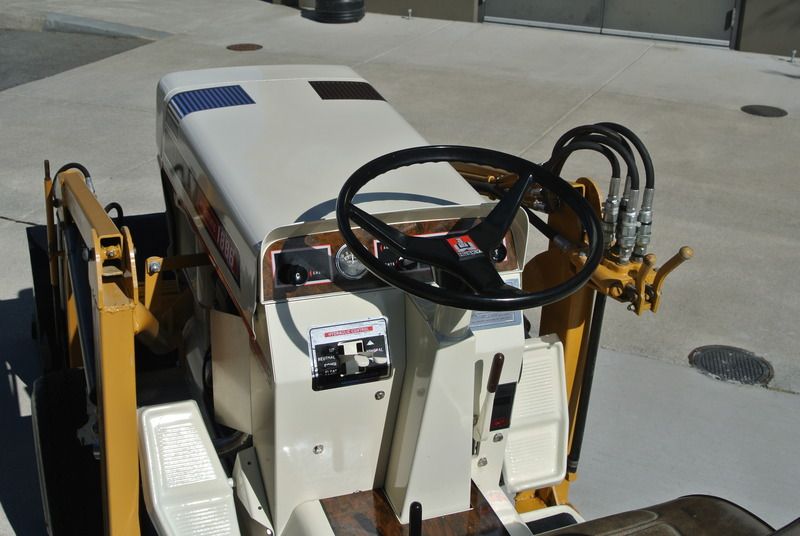
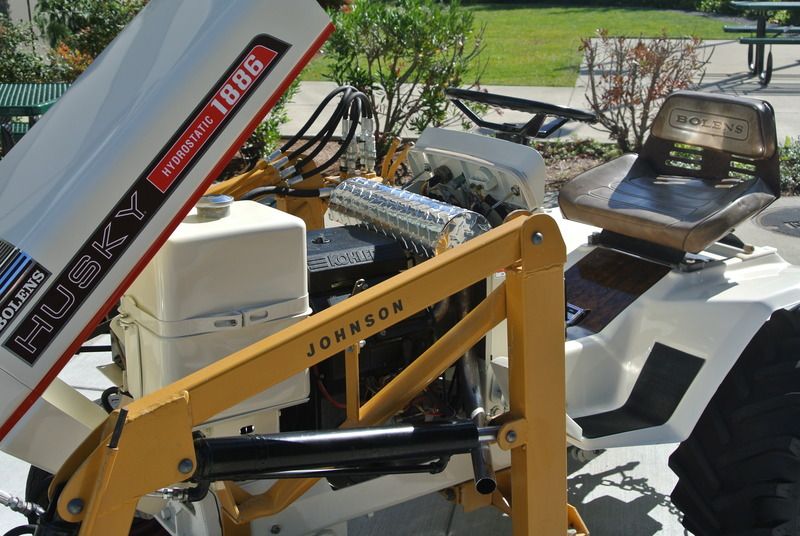
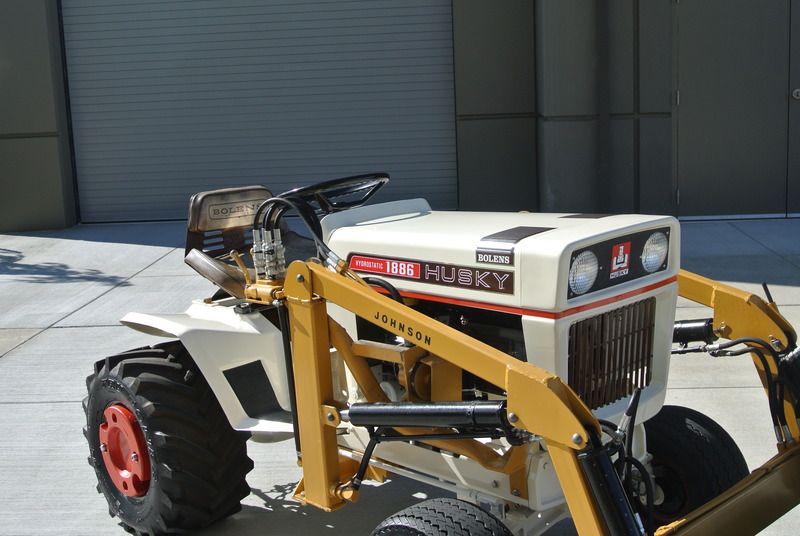
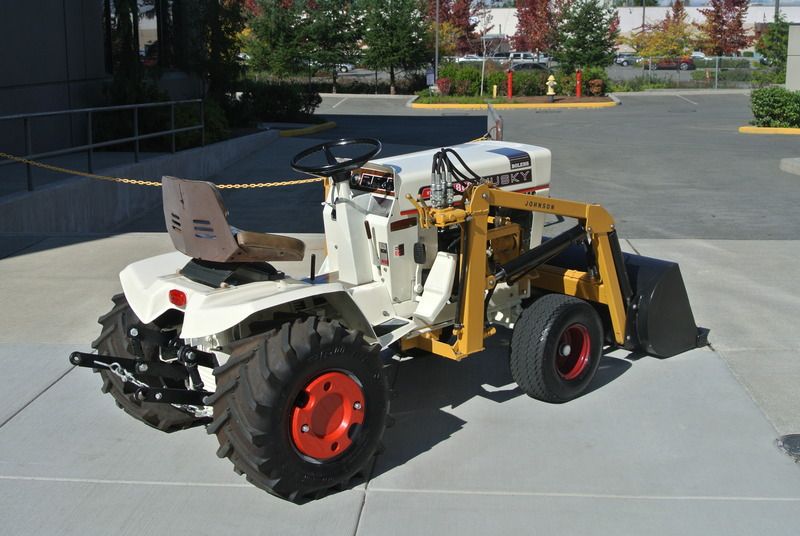
The steering wheel had the typical cracks. Unfortunately they were deep so the wheel was ground down in each affected area (picture a "V") and the slots were then filled. Because of this, the texture coating was lost in order for everything to then be even afterwards. Either have an original textured wheel with cracks, or, a refinished wheel that is none-original but has no cracks. I chose the latter. The wheel was then sprayed black and cleared and a new center cap decal installed. It was probably Chris's favorite part of the project.
Decals:

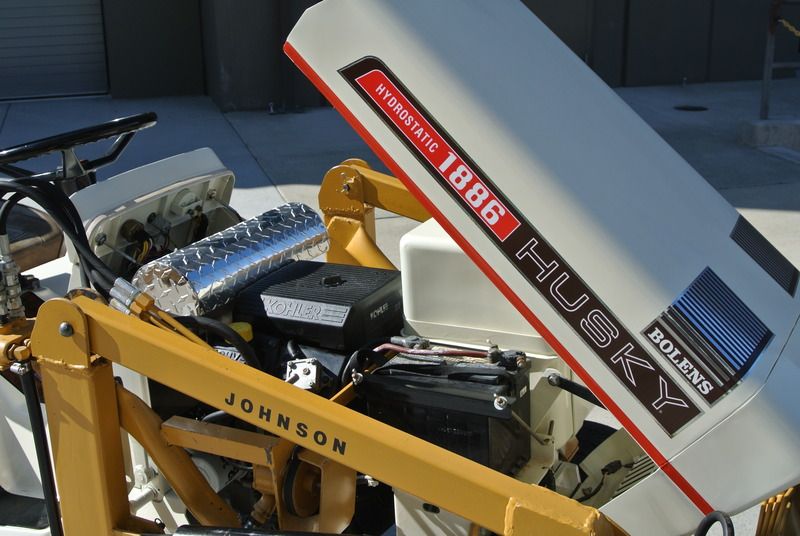
The decals are from Sam's Bolens. One of the things I've appreciated most about this tractor is that it's a resto-mod, and not factory a nut and bolt factory has allowed me the freedom to add some of my own details into it. An example of this is in the decals. I've always liked the "Husky man" center headlight decal like the earlier 1250 comes which the 1886 did not. Sam wouldn't let me swap it out but you could purchase this particular decal individually from "Click it and Stick it" and "Texas Maple Hunter." I purchased one from each place in order to make an in-hand comparison of the better quality piece. I chose the one from Click it and Stick It. The material seems comparable from both places, but the print is noticeably better quality from Click It and Stick It and nearly the same as Sam's. It also has a couple of earlier LF "hydrostatic drive" decals that were included in the kit sent in error originally for the 1455 & 1476 models.
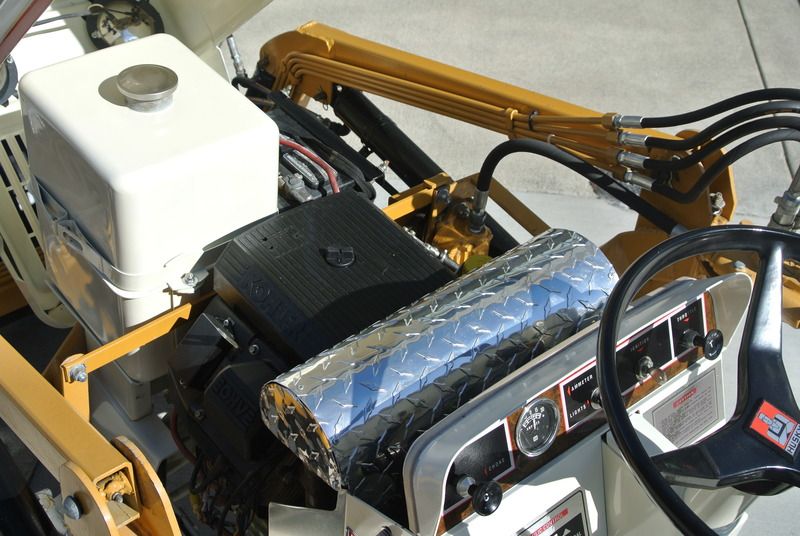
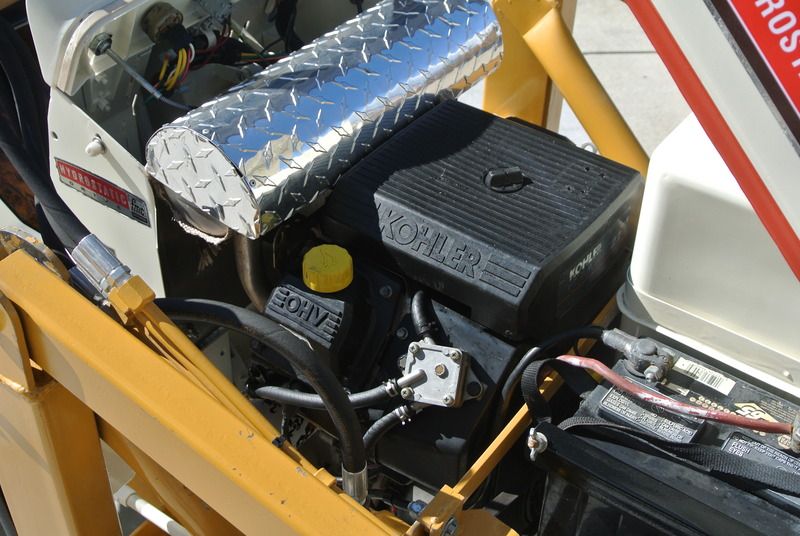
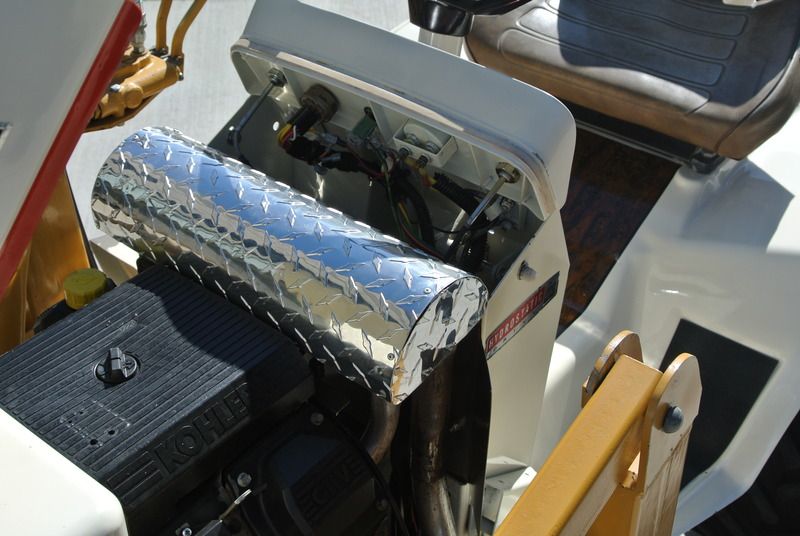
Muffler heat shield- last call:

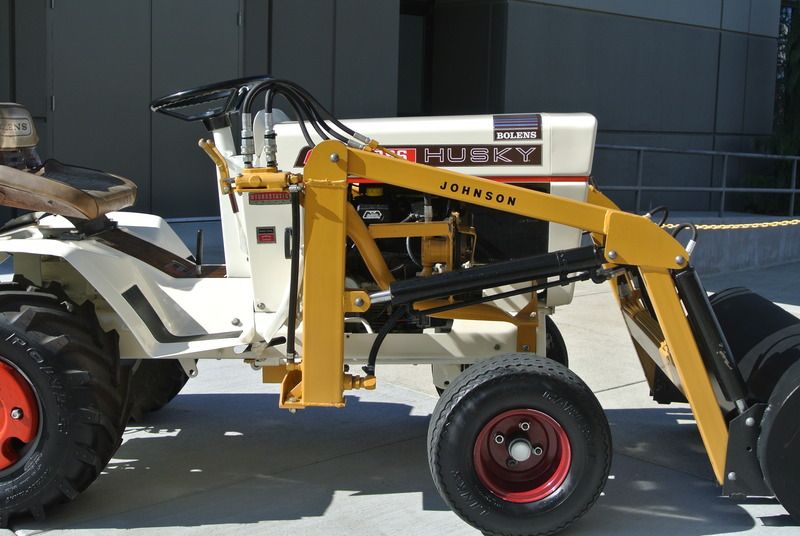
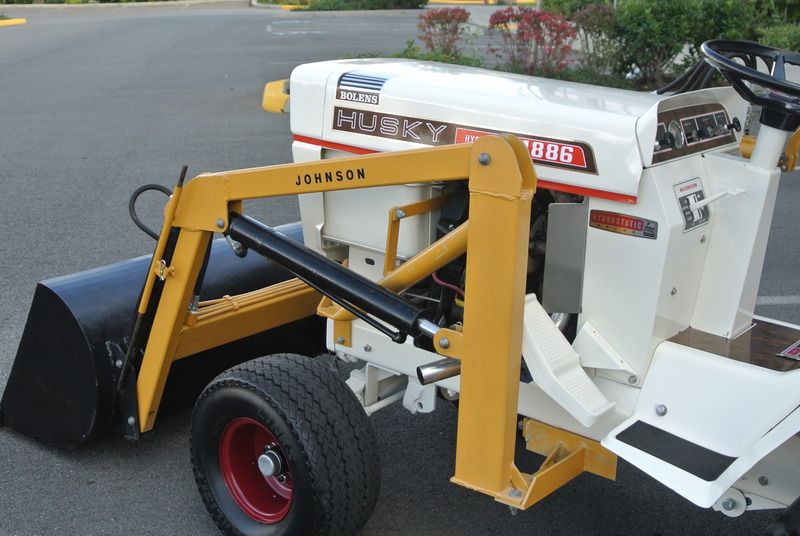
If you've followed my updates on this tractor, you'll know about that I've experimented with a couple of different muffler heat shield designs for the concealed muffler I installed. The muffler heat shield went in for a third and final design. As the first two designs being a learning experiment and discussing the project with Chris, it was decided that we needed a boxed design. This time it is made out of thicker material, diamond plate, and it also has side covers for the ends of the muffler which were the last key to the puzzle. It works and looks awesome. The reason I wanted the muffler to be hidden is that I've always loved the proud lines of Bolens tractors and I wanted to keep the body panels unobstructed as much as possible.
Exhaust pipe routing:

Again, a little bit of trial and error that was good to find out before it was painted. Even though it was positioned for a "direct stream", the flow of the previous outlet began getting one of the loader uprights somewhat sooty anyway (probably from cross breezes and such) so a new down pipe had to be made and routed to the side. It may seem like it is longer than it needs to be but it's situated in such a way that the path of exhaust flow will clear everything without the chance of getting anything black now- which I knew would drive me crazy if it happened again.
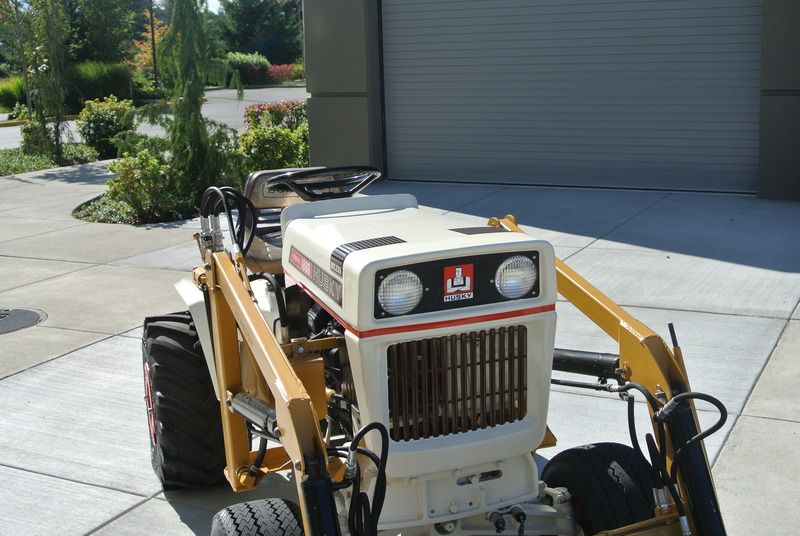
Hood hinge & fitment:

For some reason the factory hood hinge assembly was riding on the grill and putting a small crease in one of the louvers. What was strange was the hinge didn't appear to be bent. Anyway, I didn't want it touching the grill after it was painted so the hinge was clearenced and modified slightly so that it would no longer touch the grill. The hood fitment was also not that great either and was difficult to close over the nub keepers. The rear of the hood was stretched just slightly so that it could slide over them with one hand like it should without having to awkwardly lift one side over. The hood to dash gap on top was poor so we adjusted it to obtain as close of an even gap as possible.
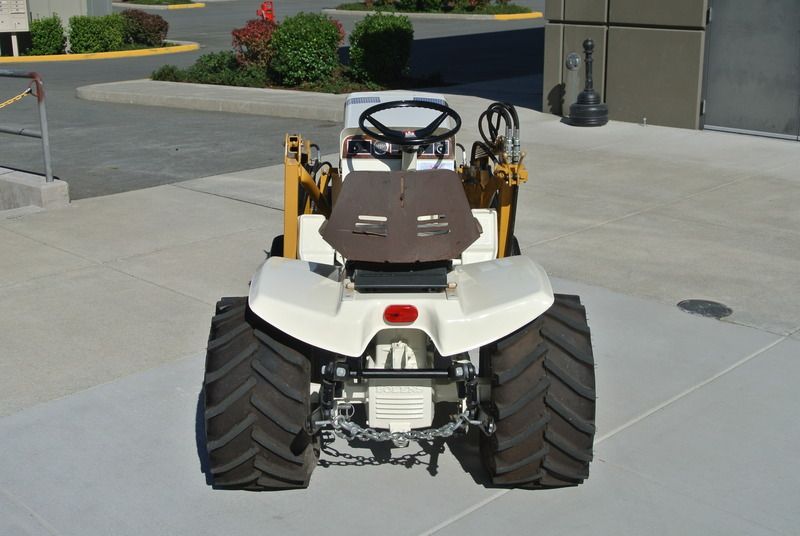
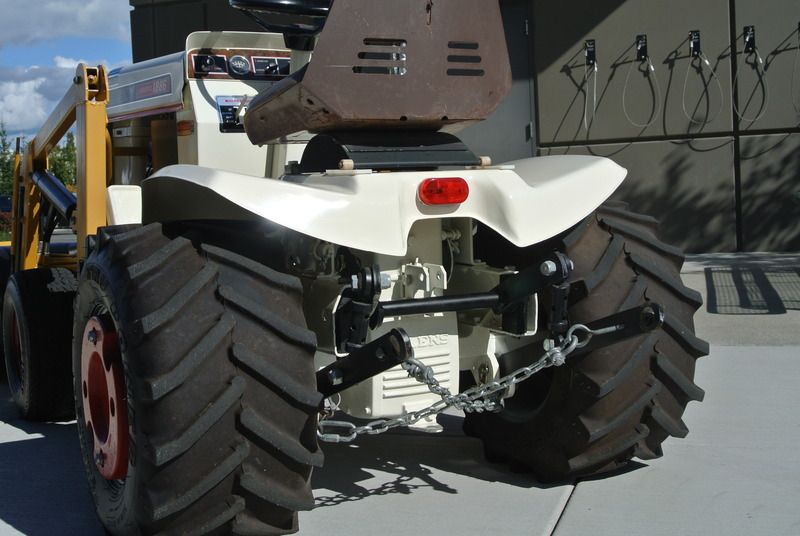
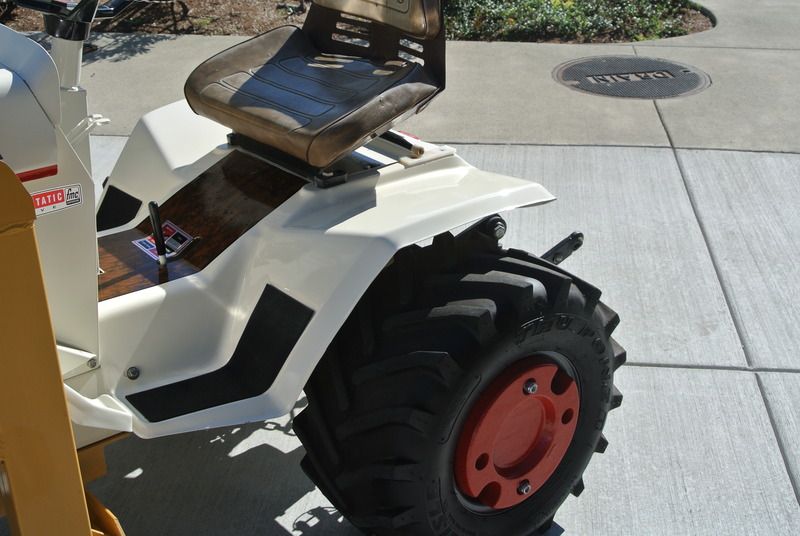
Seat:
It has not yet been restored as it needs to go an upholstery shop. At that time, I'll have the seatframe repainted or powdercoated.
Wheels:
I have some secret plans in store for a new front and rear wheel and tire setup so I didn't feel the need to get too carried away repainting these rims as they're going to be replaced. The wheel weights however were two different colors so we re-did them for the pics and interim.
Bodyman's Recognition:
I have to take a moment recognize my friend Chris who helped make this possible, met all my expectations and went above and beyond. I really appreciated his interest in the project which I think led to a higher standard level in certain areas where it could have been overlooked. I had to keep reminding him throughout the project that it was always going to be "working tractor" and not in a museum. It was important to him not to leave any rock unturned whether it was everything was filling in some pitting that was going to be covered up by the new foot pads to repainting the bucket is soon going to scratched up. My only complaint is that he's made even more difficult to get the initial dirt on it!
Now, less talking...more pics!!! :-)


_
___